
Have you thought that Swift To-Do List is too robust and powerful to turn it into a minimalistic sleek organizer, which can be even run as a small always-on-top window on the side of your desktop? Well, think again! :-)
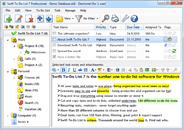
While I personally prefer to run Swift To-Do List in full-blown fullscreen mode, so I can fully focus on either managing my tasks and notes or the actual work, some people prefer using something very simple, or something that can be run as a small always-on-top window on their screens.
And even if you also prefer to run Swift To-Do List in fullscreen, this post might still inspire you to hide some parts of Swift To-Do List that you don’t use. For example, I do not use the main toolbar, because most of the operations it offers can be easily accomplished in more efficient ways.
Because Swift To-Do List is so flexible and customizable, you can turn it into a truly minimalistic, yet fully functional task and notes organizer.
This is possible for two reasons:
- You can hide just about anything that you don’t need (e.g. toolbars and panels)
- Even if you hide everything, you can still use most of the features, via right-click menus or keyboard shortcuts. For example, if you hide the tree panel, you can still switch lists using Ctrl+Tab and Ctrl+Shift+Tab. This way, you can have a tiny window with a powerhouse of all the Swift To-Do List features.
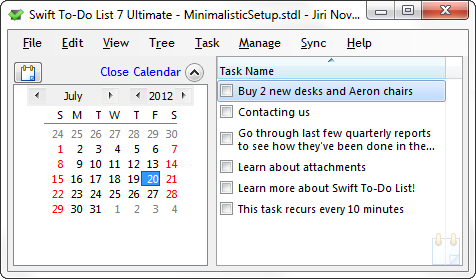
In practice, the minimal possible setup looks like this (and the window can be still made a bit smaller):
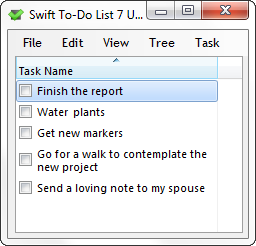
How to make Swift To-Do List minimalistic
To do this, just follow these 3 simple steps:
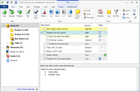
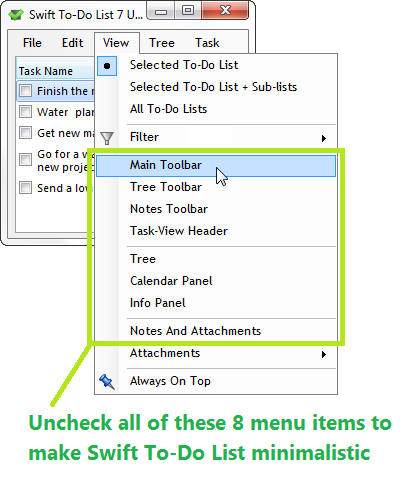
First, use the View menu to hide all the panels you don’t need:
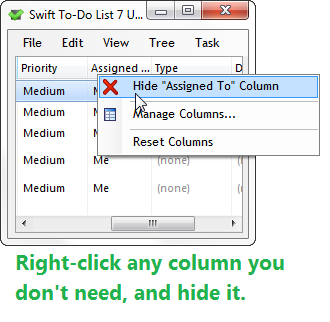
Second, hide the columns you don’t need:
And finally, resize the window as you see fit.
Optionally, if you desire so, you can make Swift To-Do List window always on top using the View menu.
You can also change the task-view and tree fonts to something smaller. Segoe UI, size 8 works great. This can be accomplished using File – Options.
Examples of other minimalistic setups
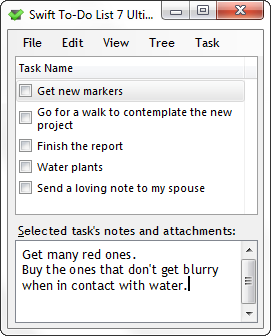
There are many variants you can try. For example, this variant includes the notes panel:
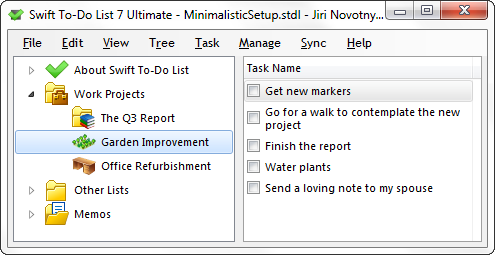
And this is a variant with to-do list tree shown:
Or, do you fancy a calendar panel instead of tree?
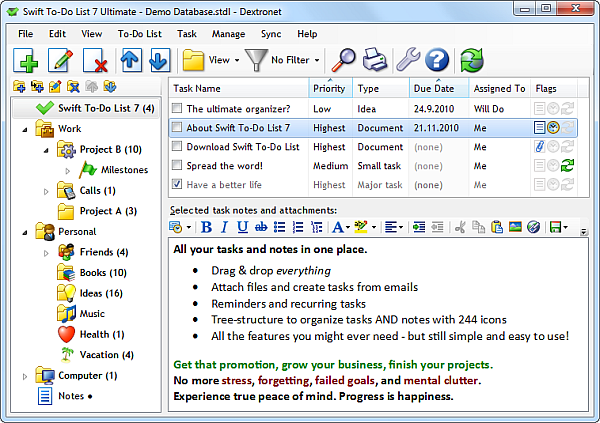
Finally, just for the heck of it, this is how the regular non-minimalistic Swift To-Do List setup looks like. The one shown below has hidden calendar panel as well as the info panel:
How to use the minimalistic setup
The short answer is – the same was as you normally would! But if you used the main toolbar heavily before, its time to learn some shortcuts and other neat tricks -
When it comes to adding tasks, there are multiple ways other than the Add Task button:
- Press Ctrl+T or Ctrl+Enter
- Hold the Alt key and click anywhere in the task-view
- Doubleclick into an empty space in the task-view
- Use the global hotkey for adding tasks, configurable in File – Options, Hotkeys. By default, it is Ctrl+Alt+A.
- Paste text into the task-view
- Drag and Drop emails into the task-view. You can also drag & drop email .eml and .msg files.
To edit a task, simply double click it, or select it and press F2 or Enter.
To switch the currently viewed to-do list, use Ctrl+Tab and Ctrl+Shift+Tab. You can also use Alt+Shift+Up/Down to navigate between tasks in all lists.
To switch view mode, press Ctrl+F1 to view only the current list, Ctrl+F2 to view current list + its sub-lists, and press Ctrl+F3 to view all tasks at once.
To find tasks, press Ctrl+F.
To delete (archive) a task, select it and press Delete.
To move tasks up or down, use mouse and just drag and drop them where you want to place them. Or, use Alt + Up/Down.
You can also right-click any task or empty space for list of available options.
—
It looks pretty cool, huh? If you still haven’t downloaded Swift To-Do List, download it and play with it. Chances are, you can make it exactly the way you want it to be.
And if you are already using Swift To-Do List, perhaps you now have some inspiration for customization. (As I said, I do not personally use the minimalistic setup. But it’s good to know that I can hide things if I don’t need them.)